Walkthrough
Plan and run a buyer tour, start to finish
A six-stop Saturday is one search, nine phone calls, a hand-drawn route and a notebook of who liked what. This is the same day in About Time Tours: nine steps, from an empty tour to signed-off feedback on every property, for every buyer in the car.
It doubles as onboarding. Read it before your first tour and you will know what each screen expects from you and what it does on its own.
Available in supported South Florida and Central/Southern Oregon markets. Check your market and MLS before getting started.
Step 1Create the tour
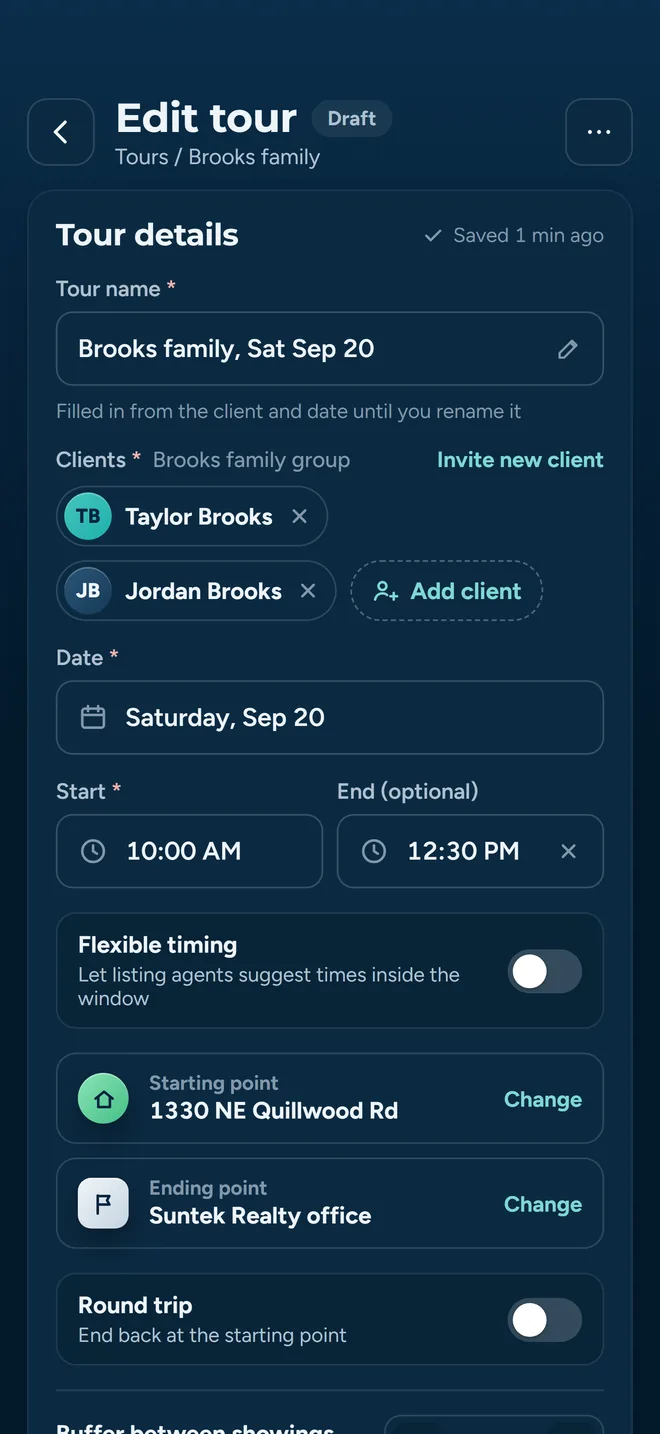
A tour is a container before it is an itinerary. Name it, date it and attach the buyers first, so every stop you add afterwards already knows who it is for.
- What you do
- Name the tour, pick the date and the start time, and choose the client or client group riding along. Flip on flexible time when the day is not anchored to a hard start.
- What the app does
- Saves the tour as a draft and keeps it off your active list until it has stops. A draft you open and abandon without adding anything is cleaned up rather than left to clutter the list.
Attaching the buyer up front is what lets the itinerary email, the per-client feedback and the showing requests all address the right people later, without you re-entering anything.
Step 2Add stops from MLS search
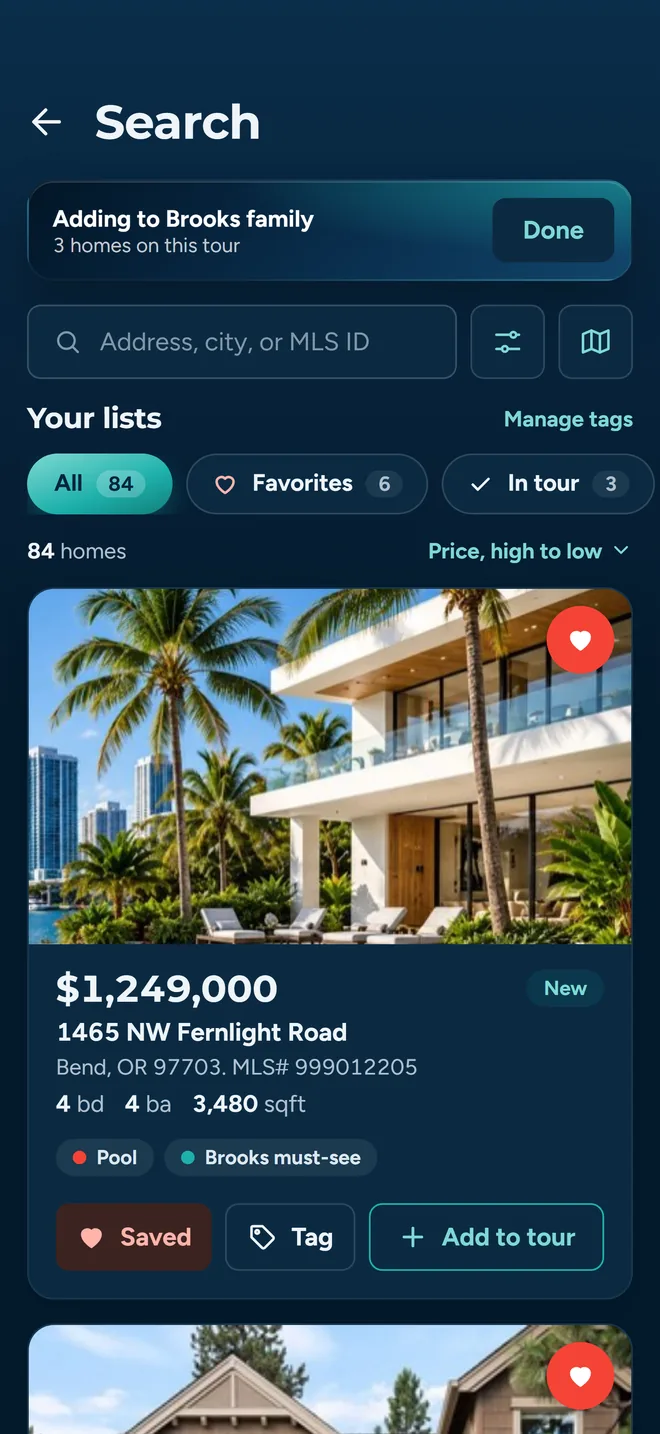
Stops come out of the MLS feed, not a copy-paste of addresses. The listing cache refreshes every 15 minutes, which is the difference between a route that works and one that sends you to a listing that went pending on Thursday.
- What you do
- Search by city, ZIP, county, price, beds, baths or square footage, or draw a polygon or radius straight on the map when the boundary matters more than the filter. Open a listing, check the photos and details, add it to the tour.
- What the app does
- Runs every search through one MLS pipeline. Coverage today is South Florida through the MIAMI Association of REALTORS®, plus Central and Southern Oregon (Bend, Medford, Klamath Falls) through the Oregon Data Share feed.
Each stop carries the listing's coordinates and the listing agent's contact details with it. That is what makes the routing in step 4 and the showing requests in step 6 work without you looking anything up twice.
Step 3Set the starting point
Where the day begins decides whether the first showing time is realistic. Left unset, the first leg is a guess.
- What you do
- Choose the office, a coffee shop, the client's house, or the first listing itself. Search by place name, drop your current location, or pick one of the nearby suggestions. Toggle 'End at your starting point' when it is a round trip.
- What the app does
- Biases place search to the center of the stops already on the tour, so a search for a coffee shop returns the ones near the properties rather than the one near your house. The start is then held fixed while the route is optimized around it.
Every arrival time downstream (the one the client sees and the one the listing agent is asked to confirm) is measured from this point.
Step 4Optimize the route
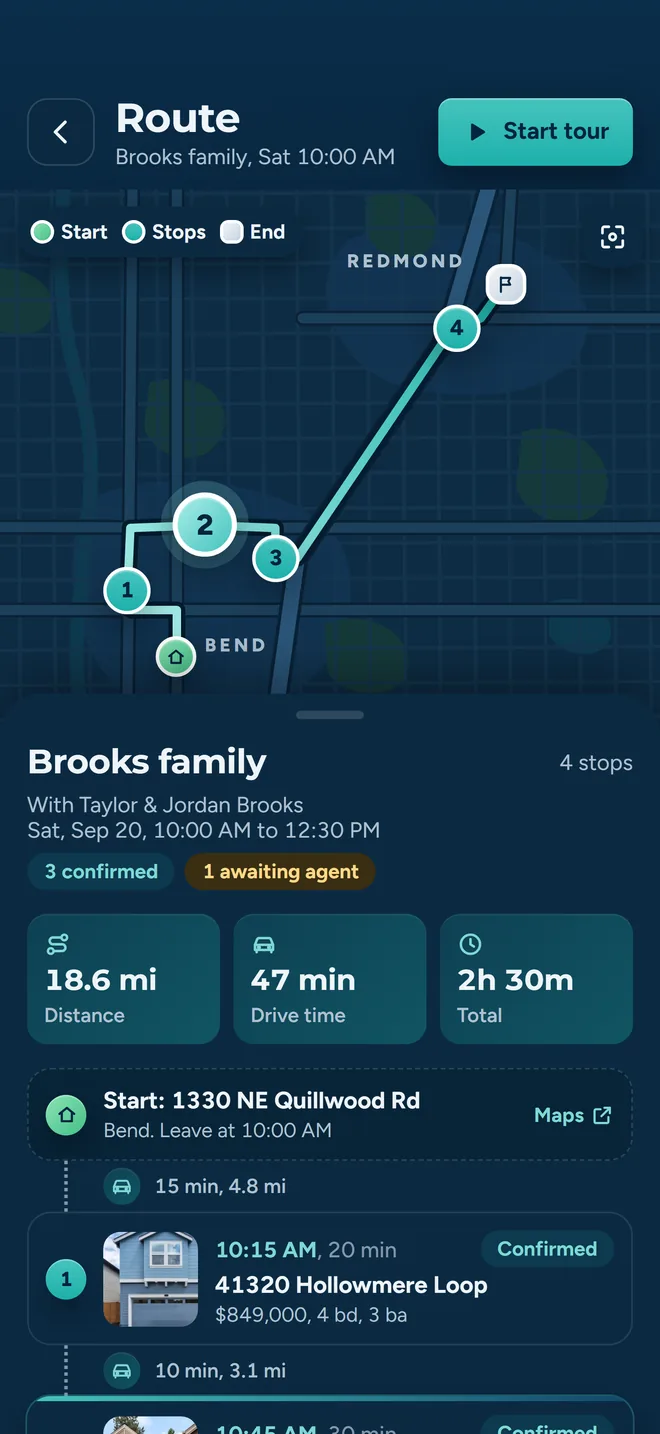
This is the step that gets the afternoon back. It is real driving time, not straight-line distance, and it respects the commitments you have already made.
- What you do
- Run the optimizer, then review. Drag a stop, override an arrival time, or change how long you plan to spend at any one property.
- What the app does
- Builds a driving-time matrix between every stop (Google Distance Matrix, OSRM as fallback, straight-line as a last resort), walks them nearest-first, then runs a 2-opt pass that swaps legs whenever it saves driving time. Each stop returns with its own drive time and mileage.
Pins stops a listing agent already confirmed so the optimizer never moves an agreed time. The free stops get routed around them.
Five things the optimizer handles for you
- Confirmed stops stay put. A stop the listing agent has already confirmed keeps its position and its time. Unlock one deliberately and the app tells you, before you do it, that you will need to re-confirm with that agent.
- Statuses follow the clock. If you unlock a confirmed stop and its time actually moves, the stop drops back to pending and is queued for a fresh request. Nobody is left waiting at the old time.
- 30 minutes a stop, 5 minutes between. Both are starting defaults. Change the visit length per property, and the buffer between showings per tour or as your own standing default.
- Double-booking check. Before the route is shown, the app looks for the same listings on other tours that same day and flags the clash.
- Your hand-ordering sticks. Reorder stops manually and the tour is marked as manually ordered, so re-opening it later does not quietly reshuffle your work.
Step 5Invite the clients
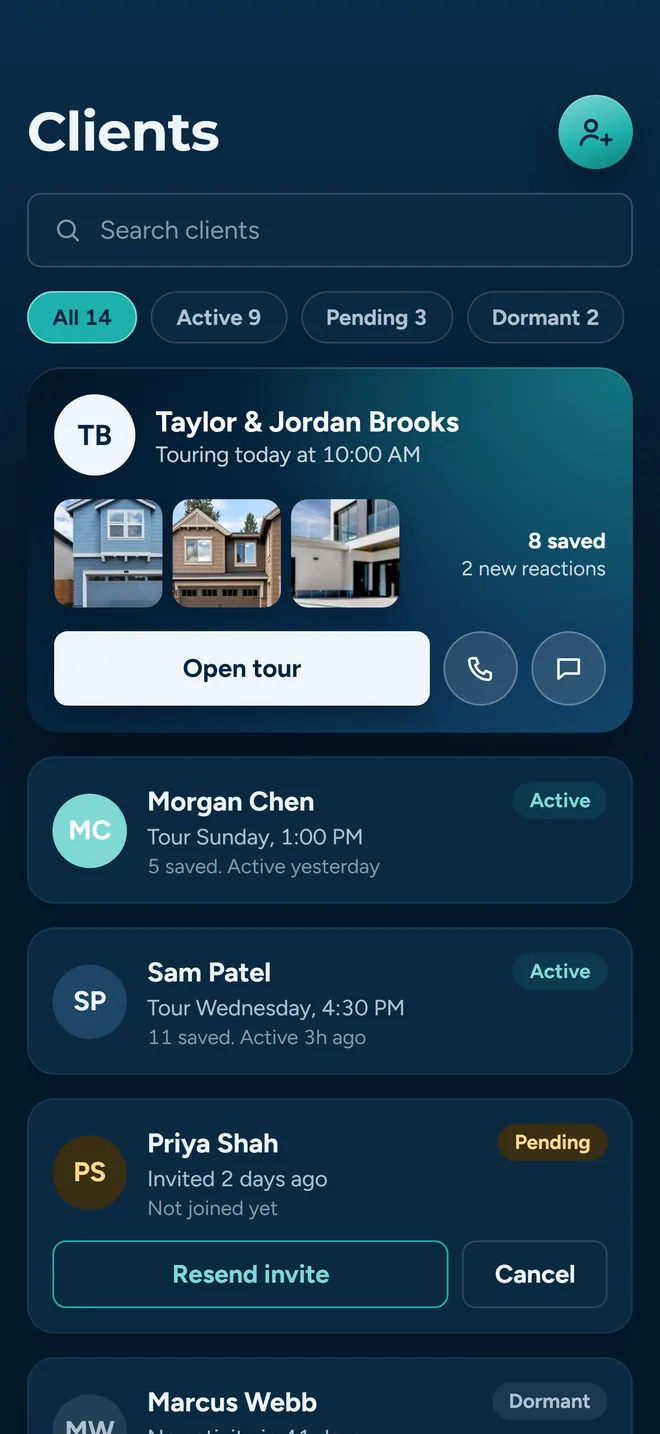
Buyers get their own account, their own view of the tour and their own opinions on record, instead of everything living in a group text you have to reconstruct on Monday.
- What you do
- Add the buyer with an email address. A phone number is optional. Send the invitation, and repeat for a second buyer if two people are touring together.
- What the app does
- Checks the address against your existing clients and any pending invitations first, and stops a duplicate before it goes out. The client accepts the invite, sets up an account with their code, and lands on the tour.
Once a buyer is in, they see the itinerary, save favorites and record their own feedback, which is what makes the two-buyer case in step 9 work at all.
If you add a phone number, the client confirms SMS consent themselves before the app sends any automated message. You can still call or text that number by hand.
Step 6Send the showing requests
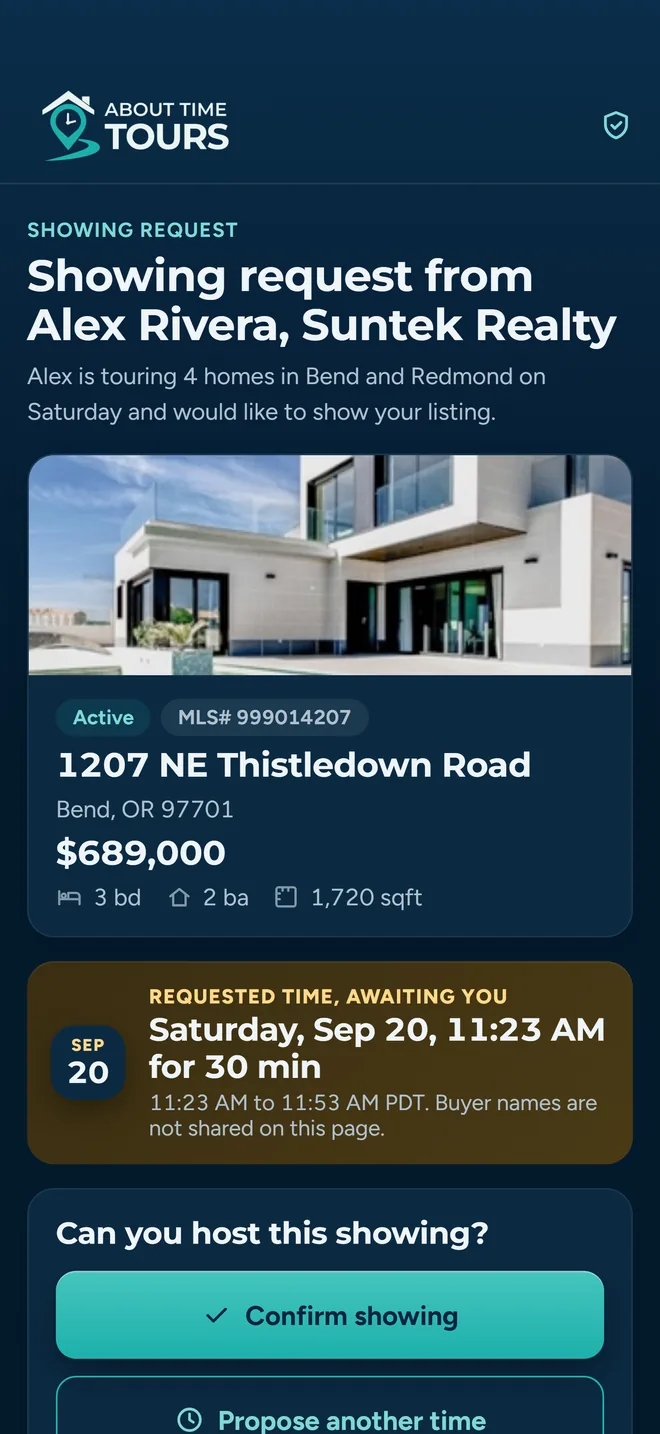
This is the round of calls and voicemails, done in one pass, and the listing agent never has to create an account to answer.
- What you do
- Open the tour's confirmation screen and send. All stops at once when you are ready, or one stop at a time when you are still shuffling the back half of the day.
- What the app does
- Emails each listing agent (and texts them where a mobile number is on file) a request naming the property, the date and the arrival window taken straight off the optimized route. Confirm and decline both run off a link carrying a token for that one stop, so there is no login and no password.
The time in that message is produced by the same schedule engine that fills the client's itinerary, so what the listing agent confirms and what your buyer was told cannot drift apart.
Step 7Track the confirmations
Some agents confirm. Some propose 2:15 instead of 1:30. Some never open the email. Each stop is tracked on its own so you can see which is which at a glance.
- What you do
- Watch the board and act on the exceptions. Accept a proposed time in place, send the stop back for rescheduling, re-send a request, or drop the property.
- What the app does
- Moves each stop through its own status as replies land, and records the listing agent's free-text scheduling notes alongside it. Accepting a proposed time updates the stop and tells the listing agent it is settled: one action, both sides.
A counter-proposal is the normal case, not the exception. Handling it in one tap is the difference between a tour that firms up on Thursday and one that is still moving on Saturday morning.
What each stop status means
- Not Sent
- No request has gone out for this stop yet.
- Pending
- The request was sent and there has been no reply.
- Opened
- The listing agent opened the request email but has not answered.
- Contacted
- You reached the listing agent outside the app and logged it here.
- Confirmed
- The showing is agreed. This stop is now pinned against re-routing.
- Needs reschedule
- The agent proposed a different time, or asked for one, and it is waiting on you.
- Declined
- The agent turned the showing down outright.
Step 8Run it in the field
On the day the app stops being a planner and becomes the thing in your hand between stops.
- What you do
- Start the tour and work down the list. Hand off to Apple Maps, Google Maps or Waze for the drive, pause when lunch runs long, and close out each stop as you leave it.
- What the app does
- Tracks which stop you are on and how long you have been there. When you move to the next property it tells that listing agent you are on the way; when you close a stop out it tells that agent you are done.
The agent waiting at stop five learns you are running twenty minutes behind without you pulling over to text them.
Step 9Capture feedback per client
Two buyers in the car means two opinions on the same house. Recording one number for the property throws away the only thing you actually needed.
- What you do
- Before moving on, mark each buyer interested or not interested on the stop you are leaving, and add notes while the house is still in front of you.
- What the app does
- Prompts for every client on the tour before moving on, and names whoever is still unmarked. But you can skip past it in two taps when the moment is not right. Feedback is saved against that client, on that stop, and the buyer is notified that it was shared.
You finish the day with a per-buyer record of every property instead of a memory of it, and it rolls up into that client's dashboard alongside their favorites and their tour history.
What the buyer sees on their side
Half of the work above only pays off because the client is in the app too. Here is their half of it.
The itinerary
Sent by email and available in the app, with the stops in visit order and their times.
Add to calendar
The tour drops into Google Calendar, Outlook or iCal, whichever they prefer.
Favorites
Buyers save properties into their own lists and can share a list back with you.
Their own verdict
Interested or not interested, per property, recorded under their name rather than merged into yours.
Before you plan your first tour
What it costs
$20 per agent per month after a 30-day free trial; $5 per agent per month for organizations of 51 to 1,000 agents; larger by agreement. Or start with guided setup.
Coverage is Central/Southern Oregon and South Florida
Central and Southern Oregon (Bend, Medford, Klamath Falls) through the Oregon Data Share feed, plus South Florida through MIAMI REALTORS®.
Phone, tablet and browser
iOS, Android and the web app share one account. Plan the tour at your desk on Thursday, run it from your phone on Saturday.
Cancelling is deliberate
Deleting a confirmed tour asks you to type DELETE, then notifies the listing agents and your clients so nobody turns up to an empty house.
Buyer agreements may be an add-on
Drafting, templates, sending and in-app signing are in the product; the signature tooling may be offered as an add-on. The nine steps above are core.
Agents are verified
Your license number is checked against the MLS feed at onboarding. Most match instantly; the rest are reviewed by a person, and you can browse meanwhile.
Try it on your next Saturday
Bring one real tour (the stops, the buyers, the listing agents you would have called anyway) and run it through these nine steps. That is the honest test of whether it saves you the afternoon.
Already have an invite? Download for iPhone or get it on Google Play.